Monday 19 December 2011

SOME MORE SET DESIGN


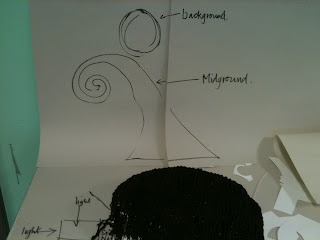
I have created small grave stones to put on top of my hills. I made them out of cardboard and plan to paint them all different shades of grey. I also made a prototype tree which I am now going to work from. I plan to make trees similar to the one in the pictures but wider. I am also going to take some twigs from my garden and put them along side my handmade trees. I am going to light them from behind.


I haven't yet painted the church doors as I wanted to wait for the whole thing to dry to decide what I wanted to do with the front. I have thought about painting the doors brown. I added a small cross on top of the church.


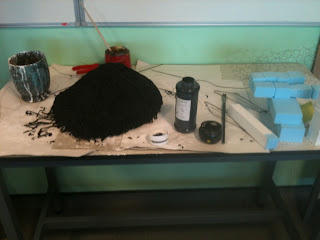
I used grass which I had previously been given by a friend in my art group. The grass was Warhammer static grass which was priced at £5 per tub. I realized that it would cost me around £50 to cover all of the my desired space with the grass. I found a much more effective and cheaper way of making the grass. I added green and blue ink to sawdust. 


The outcome was absolutely fantastic :)
Wednesday 14 December 2011

MORE ALICE IN ZOMBIELAND


I filmed on Monday 21st November in my back garden. I kept the colourful theme to the tea party scene but added a lot of gore to it. I bought lots of bright cakes and put them on a cake stand. I wanted to keep the original feel to the Alice in Wonderland movie, I also used cut up pieces of meat to look like body parts which the zombies are feeding on. I used jam tarts which immediately made me think of The Queen of Hearts. I made blood using syrup and food colouring which I added to the meat. I also used porridge oats to make the blood look thicker


Makeup and costume!


I mixed blue, purple and black eyeshadow together to create the bags under the characters eyes. I also used the blood that I made for the meat on my characters faces. 


Daniel played the Mad Hatter in my music video. He was also the Mad Hatter in the Alice in Zombieland photoshoot earlier this year.


The White Rabbit - As the song which I am using for my music video is called 'White Rabbit' I used the rabbit as the main character for my music video. I borrowed a clock from school and attached it to a piece of string which I hung from the rabbits neck. The rabbit is the only character who isn't a zombie so I didn't put the blood on Lauren's face. I drew the nose and whiskers on her face using eyeliner pen. I took the same costume from the previous Alice in Wonderland shoot for my music video also.


The Queen of Hearts - My friend Jasmin played the Queen of Hearts and She wore the costume which I used for the Alice in Zombieland photoshoot.


I began to film at around 4pm, I really enjoyed getting to direct my actors as it's something that I don't get to do very often. Daniel almost lead the way through the tea party scene because He had acted as a zombie for one of my projects before. It begins to get dark at around 4.30 so I knew I would have to do my filming over two different days. I basically wanted my characters to act like zombies. 


Set design

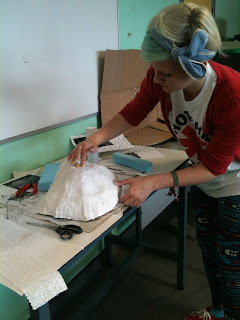
I am making a church for my set out of a cardboard box. I covered the box with mod-rock and cut doors out of the cardboard. I also made a pointed roof for my church.
I found that making the roof for my church was the hardest part of the church as I had to use 4 different bits of cardboard. After I stuck the parts together, I covered the roof in mod-rock. The mod-rock hardens together and holds a solid shape.

Monday 12 December 2011

FRUITURE

A few pictures from my most recent stop frame - Fruiture. I completed this project in about an hour. A lot of work goes into Claymation but I found that this project was simple yet effective.


The only trouble I had with this project was the positioning of the tripod. I set it up right infront of the cooker around dinner time. 


I peeled a part of the banana for each shot. Balancing the banana upright was also difficult. 

Wednesday 16 November 2011

BECOMING A ZOMBIE - PUNKS NOT DEAD

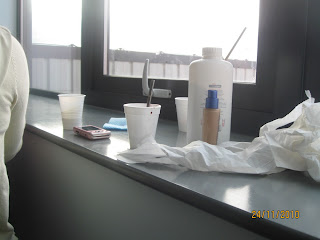
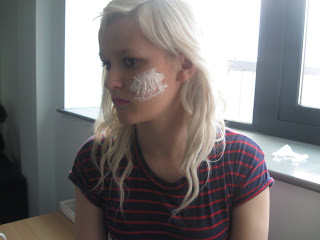
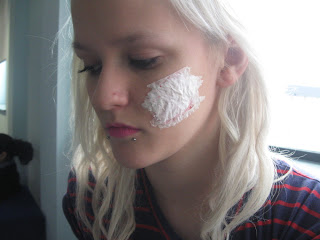
1. To do zombie makeup you will need liquid latex, tissue, syrup, red food colour(fake blood), foundation, talcum powder, 2 bowls/cup, green purple yellow eye shadow.


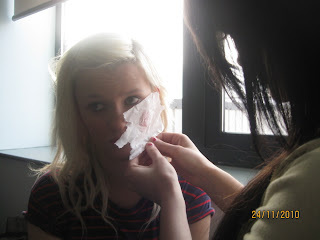
2. Pour the liquid latex into a container by itself. Paint a small bit of the latex onto cheek/neck/wherever you want it. Take a square of the tissue and split it in half so it is really thin now. Carefully, stick the tissue onto the latex.


3. Tear off the unused bits of tissue.


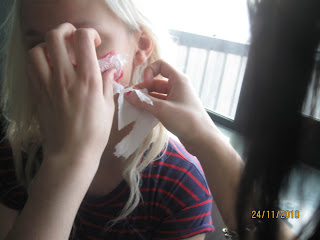
4. Paint more latex onto the tissue.


5. Cover the latex with more tissue (like paper mache with latex instead of glue). Tear off the unused bits again.


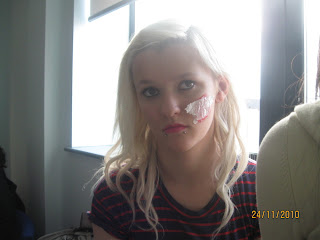
6. Keep on painting, sticking and tearing until the tissue is of a good size.


7. Begin to pull parts of the layers of latex away to create holes.


8. Mix syrup with a tiny bit of red food colouring. Pour it on the wound.


9. Use green, purple and yellow eyeshadow to create bags around eyes! 

Random Side Projects :)


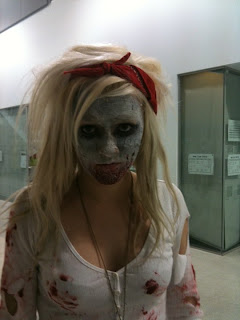
Zombie makeup on a SFX evening we did at the Kingswood school :)


 SFX night at The Kingswood School 2010

Alice in Zombieland - Production :)

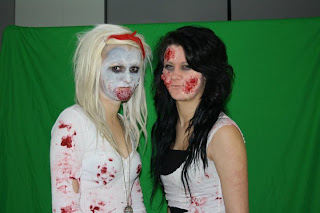
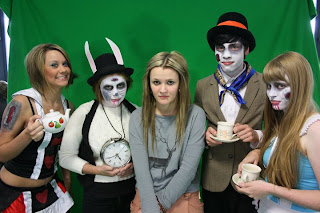
I used the media classrooms to do my makeup and to take the photos. I set up the green screen in the middle of the classroom.

The White Rabbit, I used liquid latex on Corals head and cheek. I also used purple, blue and black eye shadow. I wanted Coral to be as pale as possible to emphasise the colour of the blood and her sunken eyes. I used white snazaroo facepaint to make her look really pale. I wanted to create a really rough texture on her face to show her rotting away so I used a mixture of tissue and liquid latex to create a lumpy liquid. 


I also used snazaroo facepaint for Lorna's face but I focused more on her neck wound. I created her neck wound to look like a slit on her throat. I filled the wound up with syrup and red food colouring for blood.


I used liquid latex, white facepaint, food colouring and red food dye to create the zombie wounds.


The Red Queen, The White Rabbit, Myself, The Mad Hatter and Alice! 


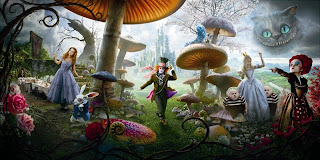
These are my final projects :) I edited them both on Photoshop. I used the official Alice in Wonderland 2010 movie promotion packs for inspiration to my project. 


SET DESIGN

As I've been making my set, I have been taking photos everyday of the process.


I started making the Nightmare before Christmas hill using chicken wire and mod-rock. I made the texture of the hill also using mod-rock which I cut up into skinnier pieces.


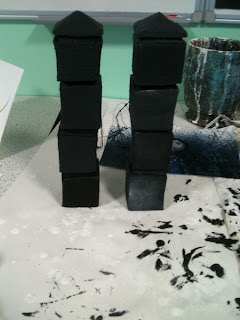
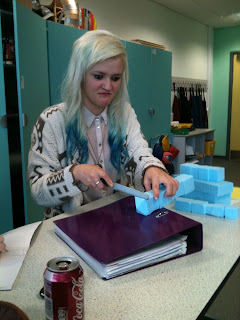
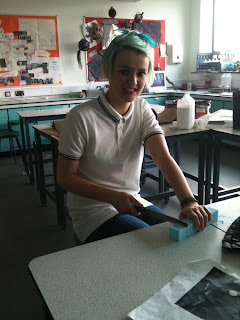
I have been making the pillars for my gate out of blue foam. I used a band saw to create the overall shape of the pillars and a file to emphasise the boldness of the bricks.

Monday 10 October 2011

Punk zombie character design

When I first began to show a real interest in animation, I had put a lot of thought into a zombie animation that I wanted to make. Although I had no plasticine at the time, I had wrote a short script and drew a few brief sketches. The character which I wanted to create was a punk zombie. I had made a created an opening scene for my as portfolio in year 12 which was extremely successful. I loved the whole process of research, planning, production and evaluation. I thought long and hard about how I could animate my character in a zombie. I found some clay that was being used in art and created a punk zombie. Although I knew that I couldn't successfully animate the zombie as clay turns solid, I made a prototype of how I would like my zombie to look.


MY FINAL ZOMBIE :)